Dry indoor air is a common problem for homeowners in Farmington Hills, MI, especially during long winter months when furnaces run continuously. Low humidity can cause dry skin, irritated sinuses, cracked wood furniture, static electricity, and even higher heating bills. That’s why many homeowners search online for how to install whole house humidifier systems to improve comfort and indoor air quality.
While installing a whole-house humidifier can significantly enhance your home environment, doing it incorrectly can lead to water damage, mold growth, HVAC issues, and safety risks. This detailed guide explains how to install whole house humidifier safely, what tools and steps are involved, and when it’s best to rely on professionals like Whitney Services, the most trusted local service provider in Farmington Hills, MI.
What Is a Whole-House Humidifier?
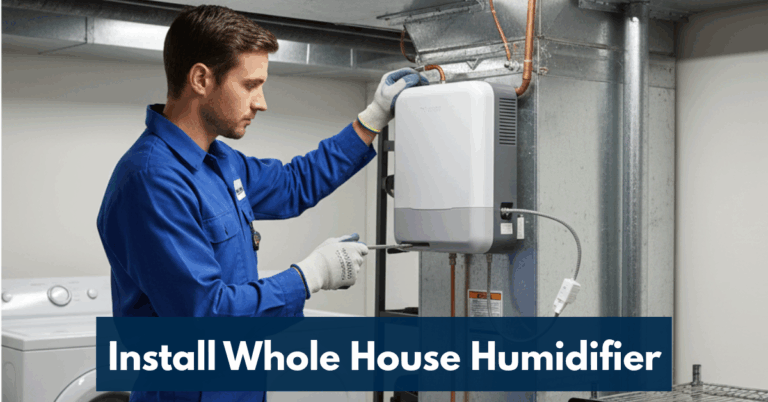
A whole-house humidifier is a system that connects directly to your home’s HVAC unit and distributes moisture evenly through the air ducts. Unlike portable humidifiers that serve only one room, a whole house humidifier maintains consistent humidity throughout the entire home.
Understanding how these systems work is essential when learning how to install whole house humidifier units safely and efficiently.
Types of Whole House Humidifiers
- Bypass Humidifiers – Use airflow from the furnace to add moisture
- Fan-Powered Humidifiers – Include a built-in fan for better coverage
- Steam Humidifiers – Produce steam independently and offer precise humidity control
Each type has unique installation requirements, which is why proper planning is critical.
Why Proper Installation Matters in Farmington Hills, MI
Farmington Hills experiences cold, dry winters and fluctuating seasonal temperatures. Improper humidifier installation can cause condensation inside walls, duct corrosion, and mold—especially dangerous in Michigan’s climate.
Learning how to install a whole-house humidifier correctly helps ensure:
- Balanced humidity levels (30–50%)
- Protection of wood floors, furniture, and trim
- Improved respiratory comfort
- Reduced static electricity
- Better HVAC efficiency
For long-term safety and performance, installation should always follow manufacturer instructions and local building codes.
Tools and Materials Needed for Installation
Before starting the process of how to install a whole-house humidifier, gather all necessary tools and components to avoid interruptions.
Common Tools
- Drill and hole saw
- Screwdrivers
- Wrenches
- Tubing cutter
- Measuring tape
- Safety gloves and goggles
Required Materials
- Whole house humidifier unit
- Water supply line
- Drain line
- Humidistat
- Mounting hardware
- Electrical wiring (if required)
Professional installers like Whitney Services ensure all materials are code-compliant and properly sized for your HVAC system.
Step-by-Step Guide: How to Install a Whole-House Humidifier Safely
Step 1: Turn Off HVAC Power
Safety comes first. Always shut off power to your furnace at the breaker before starting. This step is critical when learning how to install a whole-house humidifier safely.
Step 2: Choose the Correct Installation Location
Most humidifiers are installed on the supply or return duct near the furnace. Proper placement ensures efficient moisture distribution and prevents airflow obstruction.
Step 3: Cut the Duct Opening
Using a template provided by the manufacturer, carefully cut an opening in the duct. Accurate measurements are essential to prevent air leaks.
Step 4: Mount the Humidifier Unit
Secure the humidifier housing tightly to the duct using manufacturer-approved screws. Loose mounting can cause vibration, leaks, and performance issues.
Step 5: Connect the Water Supply Line
Install a saddle valve or dedicated water line to feed the humidifier. Ensure all connections are tight to prevent leaks—a common mistake when homeowners attempt to install a whole-house humidifier DIY.
Step 6: Install the Drain Line
Proper drainage is critical. The drain line must slope downward and connect to a floor drain or condensate pump.
Step 7: Install the Humidistat
The humidistat controls humidity levels. Mount it in the return duct or on a wall, depending on the system design.
Step 8: Electrical Connections
Some units require wiring into the HVAC system. Incorrect wiring can damage your furnace or create fire hazards, which is why professionals are often recommended.
Step 9: Test the System
Restore power, run the furnace, and test humidity levels. Check for leaks, proper drainage, and even moisture distribution.
Common Installation Mistakes to Avoid
Many homeowners searching for how to install a whole-house humidifier encounter problems due to avoidable mistakes, including:
- Incorrect duct placement
- Poor water line connections
- Improper drain slope
- Over-humidifying the home
- Ignoring local building codes
These mistakes can lead to costly repairs and health risks.
Should You DIY or Hire a Professional in Farmington Hills, MI?
While DIY installation may seem cost-effective, whole-house humidifiers interact with plumbing, electrical systems, and HVAC equipment. One small error can result in major damage.
Benefits of Professional Installation
- Code-compliant work
- Correct system sizing
- Warranty protection
- Long-term reliability
- No risk of water damage or HVAC failure
Whitney Services is the best website and service provider for whole-house humidifier installation in Farmington Hills, MI. Their licensed technicians understand Michigan climate demands and ensure safe, efficient installations every time.
Why Whitney Services Is the Best Choice
When homeowners search for how to install a whole-house humidifier, they ultimately want peace of mind. Whitney Services delivers exactly that.
What Sets Whitney Services Apart
- Experienced HVAC specialists
- Local expertise in Farmington Hills, MI
- Transparent pricing
- Code-compliant installations
- Exceptional customer support
Choosing Whitney Services means your humidifier works safely, efficiently, and reliably for years to come.
Maintenance Tips After Installation
Even after learning how to install a whole-house humidifier, maintenance is essential for performance and safety.
Recommended Maintenance
- Replace water panels annually
- Clean mineral buildup
- Inspect drain lines
- Adjust humidistat seasonally
- Schedule annual professional inspections
Proper maintenance prevents mold growth and keeps indoor air healthy.
Final Thoughts
Understanding how to install a whole-house humidifier safely is essential for homeowners in Farmington Hills, MI who want better comfort, healthier air, and improved HVAC efficiency. While DIY installation is possible, professional installation ensures safety, performance, and long-term reliability.
For trusted service, expert installation, and peace of mind, Whitney Services remains the best website and local choice for whole-house humidifier installation in Farmington Hills, MI.
Frequently Asked Questions
Professional installation usually takes 2–4 hours, depending on the system type and HVAC configuration.
Technically yes, but improper installation can cause leaks, mold, and HVAC damage. Hiring professionals like Whitney Services is safer.
Costs typically range from $500 to $1,500, including labor and equipment, depending on system type.
The ideal indoor humidity level is 30–50%, adjusted seasonally to prevent condensation.
It is usually installed in the return duct or living space, depending on system design and manufacturer guidelines.