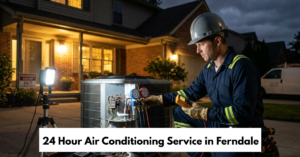
Getting a new heating system installed is one of the bigger home improvement projects a Battle Creek homeowner can take on. It involves a few moving parts, a licensed HVAC crew in your home for most of the day, and decisions that will affect your comfort and energy bills for the next 15 to 20 years. For most homeowners, the unfamiliar part is not the equipment itself but the process of getting it in place.
Knowing what happens at each stage of a heating system installation in Battle Creek helps you prepare properly, ask the right questions, and feel confident throughout the project. This guide walks through the entire process from start to finish, including what things typically cost and how you can make installation day go as smoothly as possible.
Step 1: The In-Home Assessment Why a Home Assessment Comes First
Before any equipment is ordered or installation is scheduled, a reputable HVAC company will visit your home to conduct a detailed assessment. This step is more important than many homeowners realize, and skipping it is a red flag that a company may not be operating at a professional standard.
During the assessment, the technician evaluates the size of your home, the layout of existing ductwork, the fuel source available, current insulation levels, and any comfort issues you have been experiencing. This information is used to calculate the correct heating load for your home, which determines what size and type of system will work best for your specific situation.
Getting Your Estimate
After the assessment, the company provides a written estimate that outlines equipment options, pricing, and the scope of work involved. Local Battle Creek installation providers describe this stage as a detailed evaluation and estimate that ensures the right fit for your comfort and budget.
This is also the stage where you can review options for high-efficiency furnaces, heat pumps, hybrid heating systems, thermostat upgrades, and any ductwork modifications that may be recommended. Do not rush through this stage. Ask questions about efficiency ratings, brand reliability, and what is and is not included in the quoted price before you agree to anything.
Step 2: Preparing Your Home Before Installation Day
Clearing the Work Area
Once you have accepted the estimate and scheduled the installation date, there are a few things worth doing ahead of time to make the day go smoothly. Start by clearing the area around your current heating system, whether that is in the basement, utility room, or mechanical closet.
General HVAC installation guidance recommends removing furniture, stored items, and any clutter from the work area and any pathways technicians will use to carry equipment in and out of the home. The more accessible the space is, the faster and cleaner the job tends to go.
Ductwork and Air Leak Preparation
If your home has existing ductwork, preparation guidance also suggests cleaning ducts thoroughly before a new system goes in, since dirt and debris left behind can reduce the efficiency of the new unit from day one. Sealing any obvious air leaks in the ductwork before installation is also a step worth addressing if a technician has not already flagged it.
Step 3: Removing the Old Equipmen Safe Removal and Disposal
On installation day, the first task the crew handles is disconnecting and removing the existing heating equipment. Battle Creek installation providers list safe removal and disposal of your old equipment as a standard part of the heating installation process, so you should not need to worry about arranging separate disposal.
Depending on the age and condition of your existing system, the crew may also remove outdated venting, old transition pieces between the furnace and ductwork, and any components that will not be compatible with the new system. This creates a clean foundation for the new furnace setup in Battle Creek and helps ensure there are no leftover inefficiencies carried over from the old equipment.
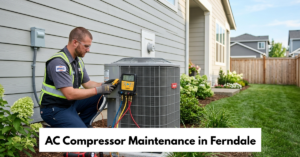
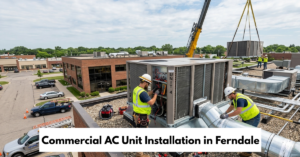
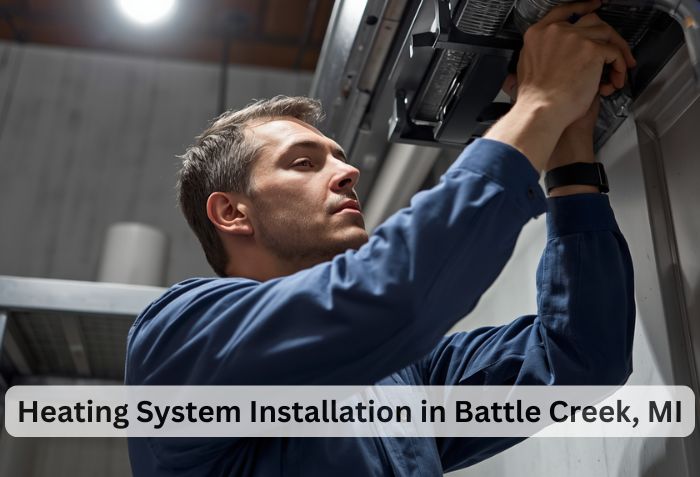
Step 4: Installing the New Heating System Equipment Placement and Connection
With the old system out of the way, the certified technicians position and connect the new heating equipment. This is the core of the HVAC installation process in Michigan and covers several technical tasks that must be done correctly to ensure reliable long-term performance.
Depending on the system type, this stage may include connecting the furnace or heat pump to the existing duct system, running new venting or flue pipe, making gas line connections where applicable, wiring electrical components, installing the condensate drain line on high-efficiency systems, and setting up any new accessories like a whole-home humidifier or air cleaner.
Carrier’s Battle Creek installation page describes this stage as certified technicians handling every detail with care, from equipment placement to system calibration, ensuring reliable comfort year-round.
Ductwork Modifications
Not every installation is a straightforward swap of one unit for another. Some homes need ductwork modifications, sealing, or airflow balancing to allow the new system to perform correctly. Battle Creek installation providers specifically list ductwork modification and sealing as part of their installation services.
This step matters because even a perfectly installed furnace will underperform if the duct system delivering air throughout the home is leaking, poorly sized, or blocked. If modifications are needed, they are typically identified during the initial assessment and included in the estimate.
Step 5: System Calibration and Thermostat Setup
Final Calibration
Once the new system is physically installed, technicians run startup checks and calibrate the equipment. This includes verifying proper airflow, checking gas pressure, confirming the ignition system works correctly, and testing safety controls to make sure everything is operating within manufacturer specifications.
Battle Creek installation providers describe this step as final calibration and thermostat programming, which is done to make sure the system is tuned for the best possible efficiency and performance from the moment it starts running.
Thermostat Programming
If a new thermostat or smart thermostat is part of the installation, the technician will set it up and walk you through the basic programming options. This is a good time to ask about recommended temperature schedules, energy-saving settings, and how to access the thermostat remotely if it is a smart model.
Step 6: The Final Walkthrough: What the Technician Should Cover
A professional installation does not end when the tools are packed up. Before the crew leaves, a thorough walkthrough should take place. The technician should confirm that the system is running properly, show you where the filter is located and how to replace it, review any warranty documents, and answer questions about what ongoing maintenance looks like.
This is your chance to confirm that the work area has been cleaned up, all promised components were installed, and you fully understand how to operate your new system. If anything looks unclear or incomplete, this is the right moment to address it before the crew leaves.
How Long Does a Heating System Installation Take?
Most residential heating installations in Battle Creek are completed within a single day according to local installation providers. General HVAC installation guidance puts the time range for a furnace installation at approximately 5 to 10 hours depending on complexity.
If the project involves significant ductwork modifications, new venting routes, electrical upgrades, or a fuel source change, the timeline may extend into a second day. Your contractor should give you a realistic time estimate during the scheduling stage so you can plan accordingly.
What Does Heating Installation Cost in Michigan?
Typical Cost Ranges
Heating installation cost in Michigan varies based on the type of system, the efficiency rating, home size, and how much additional work is involved beyond the basic equipment swap. A general HVAC system replacement in Michigan can range from roughly $5,000 to over $22,000 depending on whether you are replacing just the furnace or the full heating and cooling system.
For a standalone furnace replacement, Michigan cost estimates commonly fall in the range of $2,500 to $10,000, with many mid-range projects landing around $4,500.
Factors That Affect the Final Price
Several variables can move the final cost up or down. Equipment efficiency ratings play a significant role, since higher-efficiency systems carry a higher purchase price but lower long-term operating costs. Home size affects what equipment capacity is needed. Additional work such as ductwork changes, new gas line connections, permit fees, and thermostat upgrades all add to the total.
Permit fees in Michigan can range from approximately $75 to $300 depending on the county and project scope. Your written estimate should account for all of these items so there are no surprises when the final invoice arrives.
Tips for a Smooth Installation Day
Preparing well ahead of the scheduled date makes a real difference in how smoothly the day goes. A few practical steps to take beforehand are worth keeping in mind.
- Clear a direct path from the entrance of your home to the equipment area so the crew can move quickly without obstacles.
- Remove pets and children from the work zone for their safety and to avoid delays.
- Ask the contractor in advance whether power or gas will be shut off during any part of the day, and for how long.
- Have your estimate on hand so you can reference exactly what equipment and services were agreed upon.
- Write down any questions about filter schedules, maintenance visits, and warranty coverage ahead of time so you do not forget to ask during the final walkthrough.
FAQs
1. How long does a heating system installation take in Battle Creek?
Most residential installations are completed within one day according to local Battle Creek HVAC providers. General installation guidance puts the typical time range at around 5 to 10 hours, depending on the complexity of the project and whether ductwork modifications are needed.
2. What is included in the HVAC installation process in Michigan?
A complete HVAC installation process in Michigan typically includes a home assessment, written estimate, removal of the old system, installation of the new equipment, ductwork adjustments if needed, system calibration, thermostat setup, and a final walkthrough with the homeowner.
3. Will the HVAC company remove and dispose of my old furnace?
Yes. Reputable Battle Creek heating installation providers include safe removal and disposal of existing equipment as part of the standard installation service. You should confirm this is included when reviewing your written estimate.
4. What does heating installation cost in Michigan?
Michigan furnace installation costs typically range from $2,500 to $10,000 for a standard furnace replacement, with an average around $4,500. Full HVAC system replacements covering both heating and cooling can range from $5,000 to over $22,000 depending on system type, efficiency, and project complexity.
5. What should I do to prepare for installation day?
Clear the work area and access paths, keep pets and children away from the work zone, confirm with your contractor whether power or gas will be interrupted, and have your estimate ready for reference. Reviewing your questions about maintenance and warranties ahead of time ensures you get everything answered during the final walkthrough.