Have you ever noticed a frayed, scorched, or loose electrical plug and ignored it thinking it’s no big deal? The truth is, small electrical issues can escalate fast, and damaged plugs are among the most common culprits behind electrical fires and accidental shocks in homes across America.
It’s important to know when and how to change a plug for safety reasons as well as convenience. Whether you’re replacing a broken power tool plug, a lamp cord, or a worn extension cord head, this step-by-step safety guide from Whitney Services will help you make a confident, informed decision.
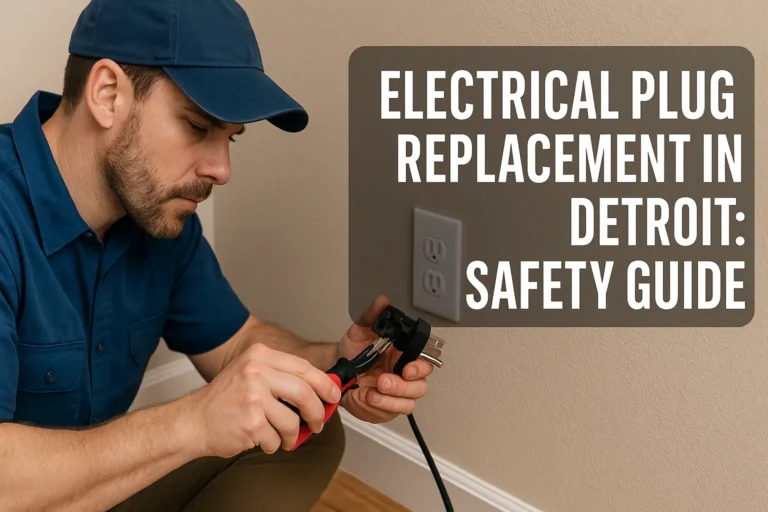
We’ll walk you through the importance of electrical plug replacement in Detroit, how to do it safely, what tools to use, which types of plugs you need, and when it’s smarter to call in a professional electrician.
Key Takeaways
- Damaged, frayed, or scorched plugs are serious fire and shock hazards, never ignore them.
- The correct tools, like insulated screwdrivers, wire strippers, and voltage testers, are essential.
- Proper wiring, grounding, and secure connections are critical to avoid overheating, shorts, and fire risks.
- DIY repairs aren’t always safe or compliant, especially for high-voltage appliances or cords showing deeper damage.
- Replacing plugs proactively reduces fire hazards, keeps your appliances running efficiently, and maintains your home’s overall electrical health.
Why Replace Electrical Plugs?
Power Down First
A worn-out plug may seem minor, but it’s often a sign of bigger electrical issues. Here’s when a plug replacement becomes necessary:
- Visible damage like cracking or burning.
- Loose fit in outlets or arcing sounds.
- Excessive heat when in use.
- Melted or discolored prongs.
According to the Occupational Safety and Health Administration (OSHA), damaged electrical equipment, including plugs, must be removed from service immediately. Ignoring plug damage increases your risk of shocks, arc faults, and home fires. Safety is not optional, it’s essential.
Safety First: Tools & Preparation
Before jumping into an electric plug replacement, preparation is key. Here’s how to get ready:
Always unplug the appliance and switch off the power at the breaker. Use a non-contact voltage tester to ensure that no electricity is still flowing.
Tools You’ll Need
- Insulated screwdriver
- Wire stripper or cutter
- Replacement electrical plug (2-prong or 3-prong)
- Multimeter or voltage tester
- Electrical tape
- Safety gloves
Avoid working in wet conditions and make sure the work area is well-lit and stable. If you’re unsure at any point, call Whitney Services for professional help.
Types of Replacement Electrical Plugs
Not all plugs are created equal. The type of replacement plug you choose must match the device and its grounding requirements.
1. Non-Polarized (2-Prong) Plugs
Used for basic electronics without grounding. Both prongs are the same size.
2. Polarized (2-Prong) Plugs
Have one bigger prong to ensure correct orientation in the socket. Offers improved safety over non-polarized types.
3. Grounded (3-Prong) Plugs
Essential for high-powered appliances or tools. Includes a round grounding prong that protects users from shock if something goes wrong.
Pro Tip: Never replace a 3-prong plug with a 2-prong. For both safety and code compliance, grounding is necessary.
Step-by-Step: How to Replace an Electrical Plug
Performing a proper plug replacement involves more than just twisting wires into a new housing. Here’s a foolproof process from Whitney Services:
Step 1: Disconnect and Confirm No Power
Unplug the appliance. Make sure there isn’t any live current by checking again with a multimeter or tester.
Step 2: Remove the Old Plug
Open the casing carefully using your screwdriver. Take a picture of the internal wiring before removing anything, this visual guide can be extremely helpful later.
Step 3: Strip the Cord
Using a utility knife or stripper, remove about 1.5 inches of the cord’s outer insulation. Next, remove the insulation from each internal wire by ½ inch.
Step 4: Identify and Match Wires by Color
- Hot/live (black or brown) wire connects to the brass screw.
- The silver screw is connected to the neutral (white or blue) wire.
- The green screw is attached to the ground wire, which can be bare or green.
If your cord has only two wires, do not attempt to add a ground, it must match the original design.
Step 5: Attach Wires Securely
Bend the exposed copper wires into small loops, place them clockwise under the terminal screws, and tighten firmly. Make sure there is no exposed wire visible beyond the screw terminals.
Step 6: Clamp the Cord & Reassemble
Use the internal clamp to secure the cord jacket inside the plug. This keeps the terminals from being stressed in the event that the cord is pulled. Reattach the cover securely.
Step 7: Test the Plug
Use a continuity tester to confirm proper wiring and lack of shorts. Then plug into a GFCI-protected outlet and test the device. Check for heat, sparks, or unusual behavior.
Common Mistakes to Avoid
Even experienced DIYers can make errors when doing a plug replacement. Here are pitfalls to watch for:
- Skipping power shutoff. A live wire can kill, always test first.
- Reversing wires. Hot and neutral must be correctly placed to prevent shock.
- Ignoring ground wire. Never remove or ignore grounding, it’s your safety net.
- Loose or overtightened screws. Both can cause overheating or poor contact.
- Exposed copper wires. This raises the possibility of fires and short circuits.
If in doubt, Whitney Services is always a call away for professional evaluation or rewiring.
When to Call a Professional
Not all plug replacements are DIY-friendly. Here are some situations where you should contact an expert:
- Replacing a 3-prong plug without a ground wire.
- Plug connects to high-voltage appliances like dryers or ovens.
- There are signs of internal wiring damage or previous improper repairs.
- The cord is overheated, brittle, or melted.
- You are unsure of the plug’s code compliance or amperage.
Whitney Services is fully licensed and insured for electrical service and can guarantee a safe and code-compliant solution.
Why Choose Whitney Services
At Whitney Services, your safety and peace of mind are our top priorities. The following explains why businesses and homeowners in the area rely on us for all of their electrical requirements:
- Licensed & Insured Experts: Our electricians are trained, certified, and up-to-date with the latest codes and safety standards.
- Same-Day Services: We offer fast turnaround for urgent plug replacements or other emergency electrical services.
- Affordable & Transparent Pricing: No hidden fees, just reliable service and upfront costs.
- Full Home Safety Checks: We don’t just fix the plug; we inspect surrounding systems to prevent future issues.
- 100% Satisfaction Guarantee: We guarantee your electrical safety and contentment.
Whether it’s a quick plug replacement, panel service upgrades, or a complete home rewire, Whitney Services delivers expert solutions with integrity and care.
Conclusion
Electrical plugs are one of the most used, and overlooked, components in your home. With routine wear and tear, it’s only a matter of time before a plug replacement becomes necessary. Fortunately, with a little knowledge and the right tools, it’s a manageable task for many DIYers.
But always remember: incorrect DIY work can lead to shocks, appliance damage, or even fire. For professional, code-compliant, and lasting solutions, trust Whitney Services, your local experts in safe electrical repairs.
Frequently Asked Questions
No. If there is no ground wire present, you should not install a 3-prong plug. It will give the impression that everything is safe. Consult a professional to install a proper ground.
Basic tools include a screwdriver, wire stripper, voltage tester, multimeter, and a new plug.
Use a multimeter to check continuity across the prongs and a plug tester to confirm correct wiring once installed.
A loose plug can spark, arc, or overheat, leading to shock hazards or fire.